How to Install a Dog Door in a Wall
Here's how to install a dog door in a wall: measure your dog and wall, verify a clear location, then cut, fit, and weatherproof the opening. Use the exact model's template and instructions, and get professional help if utilities, framing, or exterior sealing are uncertain.
On this page (9 sections)
- What should you check before installing a dog door in a wall?
- How do you choose the right flap size and location?
- Which wall dog door suits your home?
- What tools and supplies should you prepare?
- How do you mark and cut the wall opening?
- How do you fit the tunnel and secure the frames?
- How do you weatherproof an exterior wall dog door?
- How do you introduce your dog and care for the door?
- What is the final decision before cutting?
To learn how to install a dog door in a wall, start by measuring your dog and wall, confirming a clear opening, and planning the exterior weather seal. Then use the door's template to mark and cut the hole, join the tunnel and frames, and secure the assembly.
The biggest decisions happen before cutting: whether the opening fits your dog, whether the tunnel spans the wall, and whether the location avoids utilities and framing. Choose the door after those checks.
What should you check before installing a dog door in a wall?
Check wall construction, hidden obstacles, total thickness, and the landing on each side. A convenient indoor spot is unsuitable if it leads to a drop outside or crosses a pipe.
Look for outlets, switches, plumbing fixtures, vents, and framing near the proposed opening. These are warning clues, not proof that the space between them is clear.
Use suitable inspection methods and available building plans to confirm the cavity. A stud finder alone cannot rule out every wire, pipe, or obstruction.
Measure the finished wall assembly, including interior and exterior surfaces. Don't estimate thickness from the depth of a nearby window, which may have a different build.
If framing interrupts the opening, choose another location or have a contractor assess the work. Don't cut a stud or alter a header to squeeze in a pet door.
Compare our wall dog door guide and dog doors for walls and exterior doors once you know your wall measurements. Our wall mount vs. door mount comparison helps if the wall location proves awkward.
How do you choose the right flap size and location?
Choose by your dog's body measurements and comfortable movement, not weight alone. The flap opening is the usable passage; the frame and cutout are larger dimensions with different jobs.
Measure your dog standing naturally, following the door manufacturer's sizing method. Include every pet that will use the opening, especially if they differ in height or build.
Use our dog door size chart before ordering. A cardboard opening can help you judge clearance without making a permanent hole.
Keep the step low enough for comfortable access while following the model's placement instructions. Consider an older dog's mobility and a growing puppy's expected adult size.
Check the route outside for gates, stairs, standing water, and narrow spaces. Leave enough indoor clearance to remove the closing panel and reach the fasteners later.
If you're unsure which door type fits your household, start with our guide to dog doors before committing to a wall opening.
Which wall dog door suits your home?
Pick the smallest opening that comfortably fits your pets, with a tunnel that matches the finished wall. Material, flap design, and extension options should settle the choice after fit.
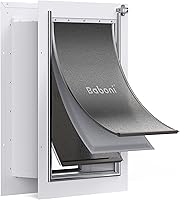
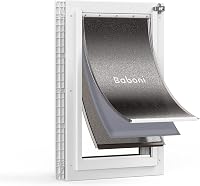
Baboni Medium: for medium pets needing a wall tunnel
The Baboni Medium suits pets up to 40 lb whose measurements fit its 8 1/4 x 12 1/4 in opening. Its 3-flap design and metal closing panel suit buyers who want multiple flap layers and a way to block pet access.
Choose it when those dimensions work without changing the wall structure. Skip it if your pet needs more clearance or your wall falls outside its tunnel range.
PetSafe Large: for larger dogs and thicker-wall planning
The PetSafe Large suits dogs up to 100 lb that fit its 10 1/4 x 16 1/4 in opening. It has a plastic frame, double flaps, and a slide-in closing panel.
Its standard tunnel covers 4 3/4–7 1/4 in walls, and compatible extensions are sold separately for thicker walls. Choose it when you need that extension route; skip it if your dog cannot pass comfortably through the opening.
PetSafe Medium: for medium dogs with a plastic-frame preference
The PetSafe Medium suits dogs up to 40 lb with an 8 1/4 x 12 1/4 in passage. It shares the Large model's standard tunnel range, extension option, double flaps, and slide-in panel.
Choose this size when your dog fits comfortably and you prefer a plastic frame. Skip it if fit is tight, even when your dog weighs less than the stated limit.
VOSOIR Large: for tall dogs and different wall depths
The VOSOIR Large has an aluminum frame and a flap opening 9.92 in wide by 18.7 in high for pets up to 110 lb. Its cutout is 10.6 in wide by 18.9 in high.
Choose it for a dog needing more opening height or a wall outside the others' standard range. Skip it for a broad dog that needs more width; its taller passage is narrower than the PetSafe Large's.
Its 2 magnetic flaps have a quick-release design for cleaning and replacement. The closing panel has aluminum locks on both sides, but it should not be treated as burglar-proof.
What tools and supplies should you prepare?
Prepare the exact door kit, template, instructions, measuring tools, and a level, plus tools suited to each wall layer. Drywall, wood sheathing, siding, and masonry can require different cutting methods.
Have suitable eye, hearing, and dust protection ready. Protect floors, contain debris, and keep pets away until the opening is finished.
Plan fasteners, compatible sealant, and any flashing before starting. If old finishes could contain lead or asbestos, arrange assessment before disturbing them.
Schedule exterior work for conditions that suit the sealing materials. Have a way to protect the opening if the job takes longer than expected.
How do you mark and cut the wall opening?
Use the exact model's cutout template, level it, and verify clearance before making a hole. Never trace around the flap or outer frame to size the cut.
Mark the proposed frame outline as well as the cut line when helpful. This shows whether the finished frame will overlap trim or leave too little room for fastening.
How do you align both sides when installing a dog door in a wall?
Transfer the opening using the manufacturer's alignment method. Measuring separately from the indoor floor and outdoor ground can produce openings at different heights.
Only make alignment holes after confirming their paths are clear. Recheck the exterior outline before cutting the outer finish.
Cut each wall layer with the appropriate tool and depth control. Avoid plunging a blade through the whole wall assembly.
Stop if you find utilities, framing, damp materials, or an unidentified layer. Resolve the obstruction before continuing, rather than enlarging or shifting the hole mid-cut.
How do you fit the tunnel and secure the frames?
Dry-fit the tunnel and both frames before final fastening when the instructions allow. The parts should join without force, cover the cut edges, and leave the flaps free to move.
Check that insulation or debris cannot fall into the passage. The finished tunnel should cover the cavity without exposed sharp edges or gaps accessible to paws.
Use a compatible extension where the model permits one. Don't stretch the assembly beyond its range or bridge a missing section with loose scrap material.
Follow the fastening sequence and tighten evenly. Overtightening can distort the frame and interfere with flap movement.
Operate every flap and insert the closing panel before sealing everything in place. Fix rubbing, twisting, or poor alignment while the assembly remains accessible.
How do you weatherproof an exterior wall dog door?
Restore the wall's water-shedding layers, then seal the joints specified by the door manufacturer. Surface caulk cannot replace flashing where the wall system requires it.
The correct detail depends on siding, masonry, and the existing weather barrier. Use a contractor if you cannot work out how water will drain around the new opening.
Keep sealant away from flap hinges, magnets, and intended drainage paths. Follow curing times before letting your dog use the passage.
Inspect after the first rain for dampness around the tunnel and interior trim. Fix water entry at its source rather than covering the indoor stain.
How do you introduce your dog and care for the door?
Begin with short, calm practice sessions and support the flaps open only as the instructions allow. Reward voluntary movement and never push or pull your dog through.
Have someone encourage your dog from the other side, then gradually introduce flap contact. Our dog door training guide explains how to build confidence without rushing.
Wipe dirt and hair from flap edges, magnets, and the tunnel using the manufacturer's cleaning method. Debris can prevent the flap from returning to its closed position.
Check fasteners, flap damage, and perimeter seals periodically, especially after severe weather. Use the closing panel when access needs to stop, and keep both landing areas clear.
For selective pet access rather than an open flap, compare electronic dog doors before choosing your installation.
What is the final decision before cutting?
The decision in how to install a dog door in a wall is whether pet fit, tunnel depth, and wall construction all work together. Don't buy a larger door to solve an uncertain wall layout.
Choose Baboni Medium for its 3-flap design, or PetSafe Medium for a plastic frame and compatible extension option. Choose PetSafe Large for more passage width, or VOSOIR Large for greater opening height and its different tunnel range.
Once the door and location are settled, follow the model's template and weatherproofing instructions. Our dog door installation guide covers the next steps if you decide a different mounting location is more practical.
Frequently asked questions
Can you install a dog door in any wall?
No. The opening must fit between suitable framing, avoid hidden utilities, and match the door's tunnel range.
Masonry, unusual siding, and walls with special fire or moisture requirements need extra planning.
Have a qualified contractor assess the location if you cannot confirm the construction or a suitable weatherproofing method.
How high should a dog door be in a wall?
Set the opening at a height your dog can cross comfortably, using the door manufacturer's placement instructions. Check the step on both sides because indoor and outdoor ground levels can differ.
A low interior threshold is little help if the outside exit leaves your dog facing a steep drop.
Do you need a tunnel for a wall dog door?
Yes, a wall dog door generally needs a tunnel to connect the frames and cover the wall cavity. Measure the complete wall assembly, including finishes, before choosing one.
If the wall exceeds the standard range, use a compatible extension approved for that model rather than leaving a gap.
Can you install a dog door in an exterior wall yourself?
You can handle some installations yourself if you can confirm a clear wall cavity, use the right tools, and restore the exterior weather barrier. Hire a qualified professional when the job involves uncertain utilities, structural changes, masonry, or unfamiliar siding details.
A template guides the cut but cannot confirm wall safety.